Tuesday, March 17, 2020

Recipe: Chai-Spiced Banana Bread

Now that we're all stuck in our homes due to the Coronavirus, we've had to make our own fun since we can't go to restaurants, bars, concerts, shows, etc. Of course my first choice was to bake something!

Years ago a friend introduced me to cardamom (I'm sure I had enjoyed this spice before, but didn't know what it was called.). I love the flavor, so when I saw it was half-price at Safeway, I immediately bought some. But then I thought: what am I going to do with it?
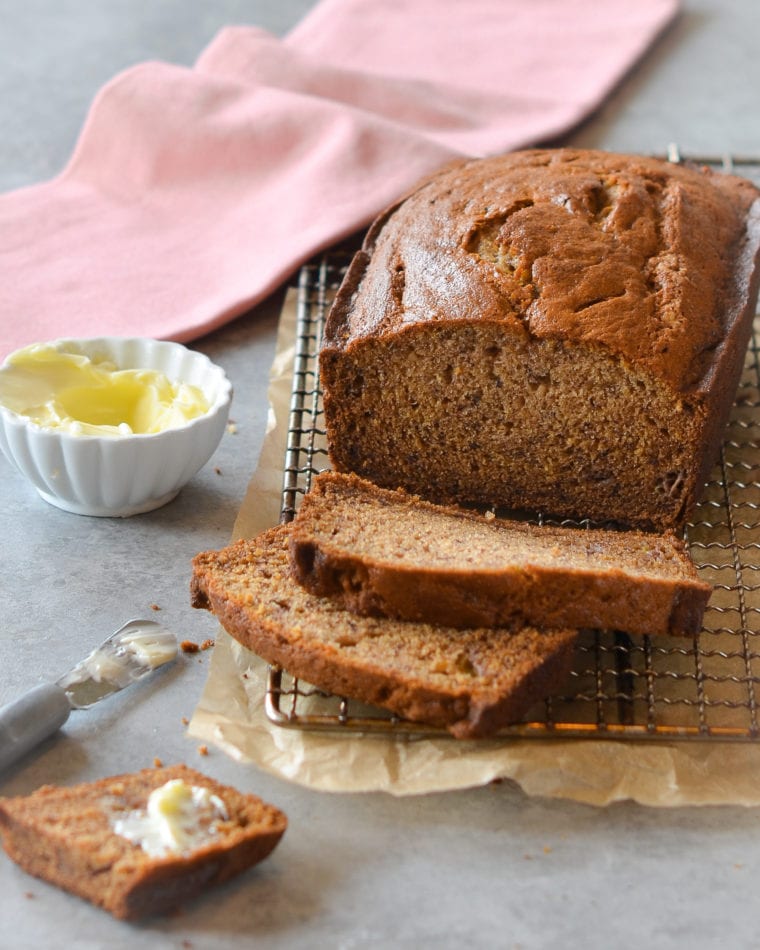
Image found here
I found this banana bread recipe on the Once Upon a Chef blog* by Jenn Segal (not sure if this particular recipe is included in her cookbook). Chai tea is my go-to coffee shop drink (since I don't like coffee), so I figured a Chai-inspired banana bread would be delicious!
INGREDIENTS
·       1 stick (1/2 cup) unsalted butter, at room temperature
·       1 cup granulated sugar
·       2 large eggs, room temperature
·       1-1/2 cups all-purpose flour, spooned into measuring cup and leveled off with a knife
·       1 teaspoon baking soda
·       3/4 teaspoon ground cardamom
·       3/4 teaspoon cinnamon
·       1/4 teaspoon ground ginger
·       1/4 teaspoon allspice
·       3/4 teaspoon salt
·       1 cup mashed very ripe bananas, from 2-3 bananas
·       1/2 cup sour cream
·       1 teaspoon vanilla
·       1/2 cup chopped walnuts (optional)
INSTRUCTIONS
1   1. Preheat oven to 350°F. Grease a 9 x 5-inch loaf pan with non-stick cooking spray.
2   2. In a large bowl or electric mixer fitted with the paddle attachment, beat the butter and sugar until light and fluffy, about 2 minutes. Beat in eggs one at a time, incorporating well after each addition. Scrape down sides of bowl as necessary.
3   3. In a medium bowl, whisk together the flour, baking soda, cardamom, cinnamon, ginger, allspice, and salt. Add to the butter mixture and beat gently until just combined. Add bananas, sour cream and vanilla and mix on low speed until just combined. Gently stir in nuts if using.
4   4. Pour batter into prepared loaf pan and bake until deep golden brown and cake tester inserted into center comes out clean, 60-70 minutes. Let rest in pan for about 10 minutes, then turn out onto rack to cool completely. This bread is best enjoyed warm out of the oven or toasted.
I followed this recipe pretty closely, except for the spices. I didn't have ground ginger or allspice, so I just added a little more cardamom and cinnamon, as well as some pumpkin pie spice. And my PAM happened to give out just before making this, but the wrapper from the butter did the trick. Thought the bread turned out great!

*Can I note that at the top of her blog post, there is a "jump to the recipe" button so you don't have to read the mumbo-jumbo-journey of the chef through this recipe-blah blah. Brilliant!

Wednesday, March 11, 2020

Sugar Cone Chocolate Chip Cookies


Image found here
After the "meh" recipe for coconut chocolate chip cookies (read that blog post here), I wanted to try another recipe. I have SO many sprinkles at home (I guess I dream of making ice cream sundaes every night), so I thought I'd use some of them up in cookies. I came across this recipe from the Taste of Home website. It seemed easy enough, and it was! I really enjoyed how this website just got down to the facts without the (long) story beforehand. Get to the important stuff!

Ingredients

  • 1 cup butter, softened
  • 3/4 cup sugar
  • 3/4 cup packed brown sugar
  • 2 large eggs
  • 3 teaspoons vanilla extract
  • 2-1/4 cups all-purpose flour
  • 1 teaspoon baking soda
  • 1/2 teaspoon salt
  • 2 cups milk chocolate chips
  • 2 cups coarsely crushed ice cream sugar cones (about 16)
  • 1 cup sprinkles

Directions

  • Preheat oven to 375°. In a large bowl, cream butter and sugars until light and fluffy. Beat in eggs and vanilla. In another bowl, whisk flour, baking soda and salt; gradually beat into creamed mixture. Stir in chocolate chips, crushed sugar cones and sprinkles.
  • Drop by tablespoonfuls 2 in. apart onto ungreased baking sheets. Bake 8-10 minutes or until golden brown. Remove from pans to wire racks to cool.
This dough was very easy to work with! It was so creamy and smooth. I didn't bother with the ice cream cones, and I only did one cup of chocolate chips (I find more than one is just overpowering to any cookie.). And the cookies came out of the oven as perfect circles! BUT... eight minutes is not long enough. Even though they looked perfect, as I tried to remove them from the cookie sheets, they started cracking and breaking. Even after I put one sheet back in the oven for another five minutes, that still didn't seem like enough time. I like my cookies soft and chewy, but they still need to be able to keep their shape!

But other than that, I was really pleased with this recipe. Very yummy, and pretty, too!

Tuesday, March 10, 2020

Review: Perfect Arrangement at Silver Spring Stage

Image found here
This past weekend I went to Silver Spring Stage to see the play Perfect Arrangement. At first I wasn't sure if this would be an offensive or distasteful show because of the Goldstar summary:

Silver Spring Stage transports audiences back to 1950’s Washington, D.C., for Topher Payne’s award-winning comedy/drama of two ideal “All-American” couples who are actually gay with a perfect arrangement of each other’s spouses. 

But the show is actually the opposite! Two lesbians (played by Maryanne Henderson and Emma Wesslund) pretend to have husbands who in reality are two gay men in their own relationship (Nicholas Temple and Brian E. Wright). The two couples have made this arrangement so that they can continue with "normal" lives, but have their own, true-love relationships behind closed doors. We learn that they have lived in this scenario for several years, but it all starts to fall apart when the government starts a witch-hunt to remove homosexuals and other "immoral" people from the ranks. In the end, three of the four of them join the movement to fight for the rights of homosexuals and to stop hiding their real identities. Honestly, the most offensive parts of the play are when the boss of a government department (played by Greg Garcia) talks down to women (saying things like " the little woman," etc.) and the others just have to play along with it.

Image found here
The on-stage chemistry was so good between the actors! I was impressed by them individually (and had seen Wesslund and Temple before in The Importance of Being Earnest last year; read that blog post here), but they were even better together. The show did hire an intimacy choreographer, Emily Sucher, from Intimacy Director International, which I had never heard of (the organization or that role in production). She spoke after the show, and it was interesting to hear her talk about her work. She works with actors to make sure there is consent between them (use the acronym FRIES), and helps choreograph the intimate scenes so that they are believable and fit the story, but also are completely comfortable for the actors. She did a great job, as did the performers, because I totally bought their love for each other!

I definitely recommend this play. Along with the important story it tells and the wonderful acting, it's also just a beautiful play to watch. The set is complete with mid-century furniture, and the costumes are definitely on-point for the 1950's. I also love this theater because the setting is very intimate; there's not a bad seat in the house!

You can still purchase tickets on Goldstar for this Friday's show! Don't wait!

Here are two other reviews about this show:
https://dcmetrotheaterarts.com/2020/02/22/perfect-arrangement-silver-spring-stage-explores-perfect-present-future-dreams/

https://mdtheatreguide.com/2020/02/theatre-review-perfect-arrangement-at-silver-spring-stage/

Monday, March 9, 2020

Recipe: Chewy Coconut Chocolate Chip Cookies

Image found here
I had leftover shredded coconut and a lot of chocolate chips, so I had to give this recipe from the Chew Out Loud blog a go. And I prefer chewy cookies, so it sounded even better!

Ingredients

  • 1 cup all purpose flour
  • 1 tsp cornstarch
  • 1 tsp baking soda
  • 1/2 tsp baking powder
  • 1/4 tsp table salt
  • 1/4 cup salted butter, softened to room temp (not melty)
  • 1/2 cup light brown sugar, packed
  • 1/3 cup granulated sugar
  • 1 large egg
  • 2 tsp pure vanilla extract
  • 1 1/2 cups finely shredded coconut, sweetened or unsweetened
  • 1 1/2 cups semi-sweet chocolate chips

Instructions

  1. In a bowl, whisk together the flour, cornstarch, baking soda, baking powder, and salt. Set aside.
  2. In the bowl of a stand mixer fitted with paddle attachment, blend together the butter and both sugars until fluffy and light, 3-4 minutes. (Alternatively, you can use an electric hand whisk.) Add egg and vanilla extract, mixing until incorporated and smooth.
  3. On low speed, gently mix in the dry flour mixture just until incorporated, scraping down the sides as needed; do not over-mix. Add coconut and chocolate chips and slowly mix just until combined; again, do not over-mix. Wrap dough airtight in cling wrap and chill for at least 1 hours, or up to several days in fridge.
  4. When ready to bake, heat oven to 350°F, with rack on lower middle position. Line baking sheets with parchment or silicone mat. Let chilled dough sit at room temp 5-10 min. Form 1 TB rounded dough balls, 2 inches apart on lined baking sheets. Slightly depress dough balls, as they will only spread moderately during baking. Bake about 8 minutes or just until golden; cookies will seem slightly under-baked, but will set upon cooling.
I wanted to make the cookies right then and there, so I did not refrigerate the dough. And my brown sugar had turned into a solid rock, so I used more white granulated sugar instead. But otherwise I think I followed the recipe closely. And they do taste good and are chewy!

But overall I was disappointed with this recipe. The dough was SO hard to work with. Perhaps it was because the coconut I used was sort of dry, but it didn't incorporate well, and neither did the chocolate chips. After I had made the cookies into balls, I had more than a handful of chocolate chips left at the bottom of the bowl. What a waste! I did save them so I can add them to some granola, but when I make a recipe, I expect to use all of the ingredients. And because the incorporating wasn't good, it was difficult to shape the cookies as well. Maybe I over-mixed the dough, but it didn't feel like it!

There are lots of coconut chocolate chip recipes out there. I would recommend trying something else. (Like the sprinkle chocolate chip cookies I made the next day.)

Friday, March 6, 2020

Recipe: Spaghetti Squash Yakisoba Style

Image found here

I'm always looking for new ways to eat spaghetti squash that's not just with pasta sauce. So when I saw this Asian-inspired recipe on the Pickled Plum blog, I definitely wanted to try it.

This is one of those blogs that goes on and ON before finally getting to the ingredients and instructions. So I'm going to save you the time and give you all of that in the beginning:

Ingredients
  • 1.5 pounds spaghetti squash
  • 1 small onion (finely chopped)
  • 10 shiitake mushrooms (or button mushrooms)
  • 2 stalks scallions (finely chopped)
  • 1 cup coleslaw mix of carrots and cabbage
  • 1 tablespoon vegetable oil
  • 1 teaspoon dried red chile (chopped) - optional
  • 1 tablespoon sesame seeds
For the sauce:
  • 2 tablespoons soy sauce
  • 2 tablespoons dark soy sauce or regular soy sauce
  • 1/2 tablespoon granulated sugar
  • salt and white pepper to taste
Directions

1. Place spaghetti squash on a microwave safe plate or other microwave safe container. Place the cut side down (skin facing up). Microwave on high for 10 minutes.
2. Take the spaghetti squash out of the microwave and shred with a fork. If the squash is still hard, microwave for another 2-3 minutes, or until tender.
3. Use a fork and scrape the flesh into strings.
4. In a large pan over high heat, add vegetable oil and onions. Cook for 3 minutes or until onions are soft. Add coleslaw mix and red chile and cook for 2 minutes.
5. Add shiitake mushrooms and cook for another 2 minutes.
6. Add spaghetti squash, scallions and sauce, and mix well until the sauce has evenly coated all the vegetables. Cook for 2 minutes and turn the heat off. 
7. Transfer to a bowl, top with sesame seeds and serve.  

As usual, I didn't bother with all of the ingredients. For the sauce, I just poured in a bunch of soy sauce. And I didn't buy fancy mushrooms or sesame seeds just for this recipe. I just bought regular sliced white mushrooms, and I added bean sprouts for a little crunch. And I don't like things to be too spicy, so I did not use any red chile.

And I cook my spaghetti squash differently. I still recommend microwaving it (SO much faster than roasting it in the oven!), but I don't even cut it before hand. I just take a knife and poke lots of holes into the skin to let out the steam as it cooks. I microwave it for five minutes, roll it over, and then microwave it for another five minutes. Works like a charm!

Unlike the recipe says, I'm not sure I would cook everything on high heat. I burned the onions a little bit because it was so hot. I think medium-high heat would be sufficient.

Otherwise I thought this recipe was pretty good! For me it made three servings; this may depend on the size of squash you start with (I did not weigh my squash, clearly.). The recipe was easy to make, so I will certainly keep it in mind for future meals.